
What are Sonarr and Radarr? Sonarr and Radarr are free, open-source automation tools used by data hoarders to manage massive digital archives. Sonarr automatically searches for and retrieves sequential digital media, while Radarr handles standalone high-resolution assets. They work by connecting your search indexers to your download software.
If you have learned how to download from Usenet, you know that doing it manually can be tedious.
You have to open your web browser, go to an indexer, search for a specific digital asset, download the NZB file, open your newsreader, and wait for it to finish. Then, you have to manually rename the messy file so your Plex or Jellyfin server can recognize it.
What if your computer could do all of that for you while you sleep?
That is exactly what Sonarr and Radarr do. In this guide, we will explain how these two sister programs work together to create the ultimate, fully automated home media server.
The Difference Between Sonarr and Radarr
While they look almost identical and share the same underlying code, they serve two distinct purposes for archiving data:
- Sonarr: This program is built specifically for sequential multi-part posts. It understands complex metadata, such as grouped posts, sequential numbering, and posts published over time. You simply tell Sonarr you want to track a specific ongoing series of posts, and it will automatically monitor the internet and retrieve new files the minute they are published.
- Radarr: This program is built specifically for standalone, high-resolution media. You tell Radarr you want to archive a specific file, and it will monitor the internet until an uncompressed, lossless version becomes available, and then retrieve it automatically.
Both of these programs are incredibly lightweight and run perfectly on a Raspberry Pi NAS or a dedicated home server.
The same automation approach extends beyond video and audio. If you also archive digital literature, Readarr applies the identical Sonarr/Radarr logic to EPUB, MOBI, and PDF files.
How the Automation Stack Works
Sonarr and Radarr are the “brains” of the operation, but they do not actually download anything themselves. They act as the middleman between your search engines and your download software.
Here is how the fully automated workflow operates:
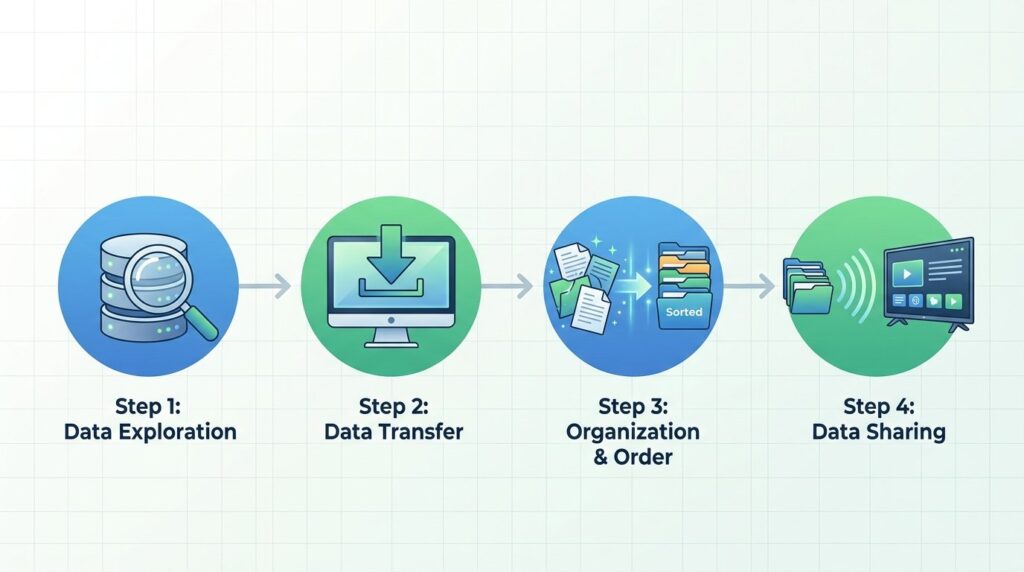
1. The Request
You open the Sonarr or Radarr web interface on your phone or computer and add a digital asset to your “Wanted” list. On mobile, many data hoarders skip the browser entirely and use a dedicated app like NZB360 or LunaSea instead.
2. The Search (Indexers)
Every 15 minutes, Sonarr and Radarr use an API key to silently search your best Usenet indexers (like NZBgeek or DrunkenSlug). They scan the new uploads to see if your requested file is available.
3. The Download (Newsreaders)
Once they find a file that matches your quality settings (e.g., a massive public domain archive), they grab the NZB file and automatically send it to your Usenet newsreader (like SABnzbd or NZBGet).
SABnzbd then connects to your Usenet provider and downloads the massive file at gigabit speeds.
4. The Organization (Renaming)
This is the best part. When SABnzbd finishes the download, it tells Sonarr/Radarr. The automation software then takes the messy downloaded file (e.g., Public.Domain.Archive.v2.0.2026.HighRes.mp4), renames it perfectly (e.g., Public Domain Archive (2026).mp4) and moves it into your media folder.
Plex immediately sees the new file, downloads the metadata, and makes it available to stream on your local network. You never lifted a finger.
How to Set Up Sonarr and Radarr
Setting up this automation stack takes a little bit of patience, but you only have to do it once.
Step 1: Install the Software Both Sonarr and Radarr are free to download from their official websites. Install them on the same machine that runs your Plex server and your download client (SABnzbd/NZBGet).
Step 2: Add Your Indexers Open the settings in Sonarr/Radarr and go to the “Indexers” tab. You will need to log into your premium indexer (like NZBgeek), copy your personal API key, and paste it into Sonarr. This allows Sonarr to search the indexer on your behalf.
Step 3: Connect Your Download Client Go to the “Download Clients” tab. Enter the IP address and API key for SABnzbd or NZBGet. This gives Sonarr permission to send files to the downloader.
Step 4: Add Your Media Click the “Add New” button, search for your desired digital asset, and click add. The software will take over from there!
Going Further With Your Automation Stack
Once the core Sonarr and Radarr setup is running, several companion tools can extend or refine it. If you are choosing an indexer layer, compare NZBHydra2 against Prowlarr or read the NZBHydra2 beginner’s guide. For managing quality profiles across multiple instances, see what Profilarr does for Sonarr and Radarr. And if you are weighing your options against legacy tools, check out our guides to Sonarr alternatives and Radarr vs CouchPotato. On the download client side, see SABnzbd vs NZBGet and our SABnzbd speed optimization guide. For indexer management across your whole stack, our Prowlarr setup guide covers syncing indexers to every connected app. Want a single dashboard for your whole stack? Compare Homarr vs Homepage. And if privacy matters to your setup, pairing the whole stack with NordVPN is worth doing before you scale up automation.